
tHIS PAGE WILL SOON BE DELETED. I HAVE MORE INSTRUCTIONS
AND VIDEOS FOR FREE ON MY DEDICATED WEBSITE
HALLETT-AI.COM
UPDATED NOVEMBER 27, 2023 - Even after a year, its best practice to use the 3 step process to configure Windows to run Stable Diffusion.
Step 1:
Install Git for Windows.
Github is a repository, or storage place for Open Source software. Developers from around the world host their latest code with Github. Don’t worry, its very safe to follow all of these instructions. This app will allow all programs hosted on Github to update.
https://gitforwindows.org/
Click “Next” to all defaults. YES you want Git in the PATH environment.
I have a detailed startup and explanation guide on Youtube as well.

Step 2:
Installing Python. This is a programming language. Having it on your Windows system will allow your new Github download to “compile” into a full program.
https://www.python.org/downloads/release/python-3106/
Make sure to check “Add Python 3.10 to PATH" This is very important, and do not install the latest version You must use 3.10.6
Requirements:
Your PC should run Windows 10 or higher with a Nivdia GPU with 4 GB VRAM or more. Just like GPU rendering, the higher the resolution image you generate, the more VRAM will be consumed.
All the software required is free and open source. We are going to use Stable Diffusion as the backbone and to interface with Automatic1111. If you’ve ever experimented with open source research software from Github, you’ll know that in the early days of development the only way to process images is through text commands. Automatic1111 replaces the need to text commands to generate images. - I wrote that in March 2023.


Step 3:
It may be 2024, but we need to go back to DOS and open a Command Prompt Window.
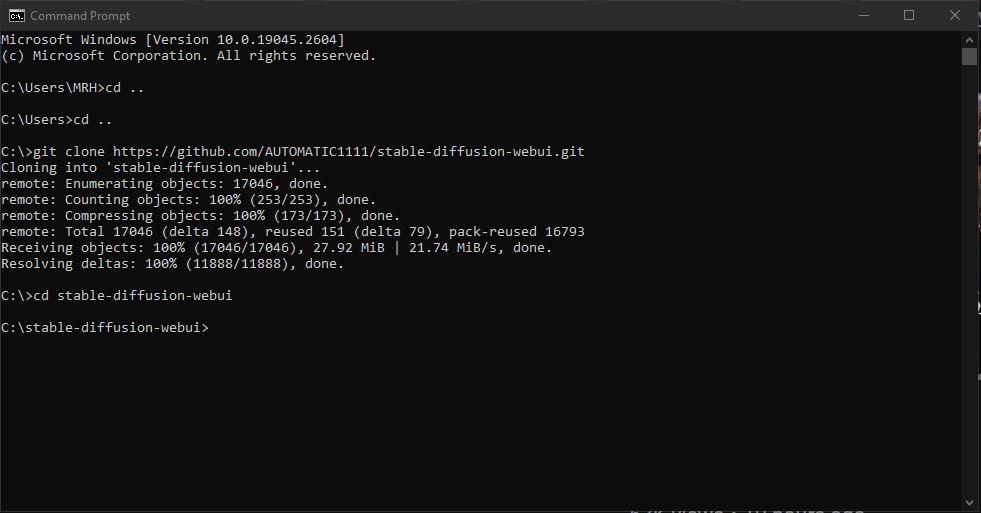
Search and type: CMDA black screen will appear. Type:
cd C:\or
cd ..cd ..git clone https://github.com/AUTOMATIC1111/stable-diffusion-webui.gitIt should look like this in the image below. cd .. (means change directory back 1)
Step 4:
You can now close Command Prompt and return to Windows File Explorer. In the future, if you want to try new programs from Github. “git clone” is often the first step.
We need to edit the “webui-user.bat” file using notepad. This is the file we use every time we want to run Stable Diffusion. But first we need to edit the defaults.


@echo off

set PYTHON=
set GIT=
set VENV_DIR=
set COMMANDLINE_ARGS= --api --xformers

#automatic updates each time you run
git pull

call webui.bat
Step 5:
We can now run the webui-user.bat file, and the command window will return and start to download and install dependencies automatically. Once complete it will be ready to go, but first we need to update it further.

“—api” allows access to the Photoshop plugin and other extensions
“—xformers” will increase speed
“—medvram” or “lowvram” can be added to the command line if you have less than 12GB or 8GB
“git pull” will update SD everytime you run.
Step 6:
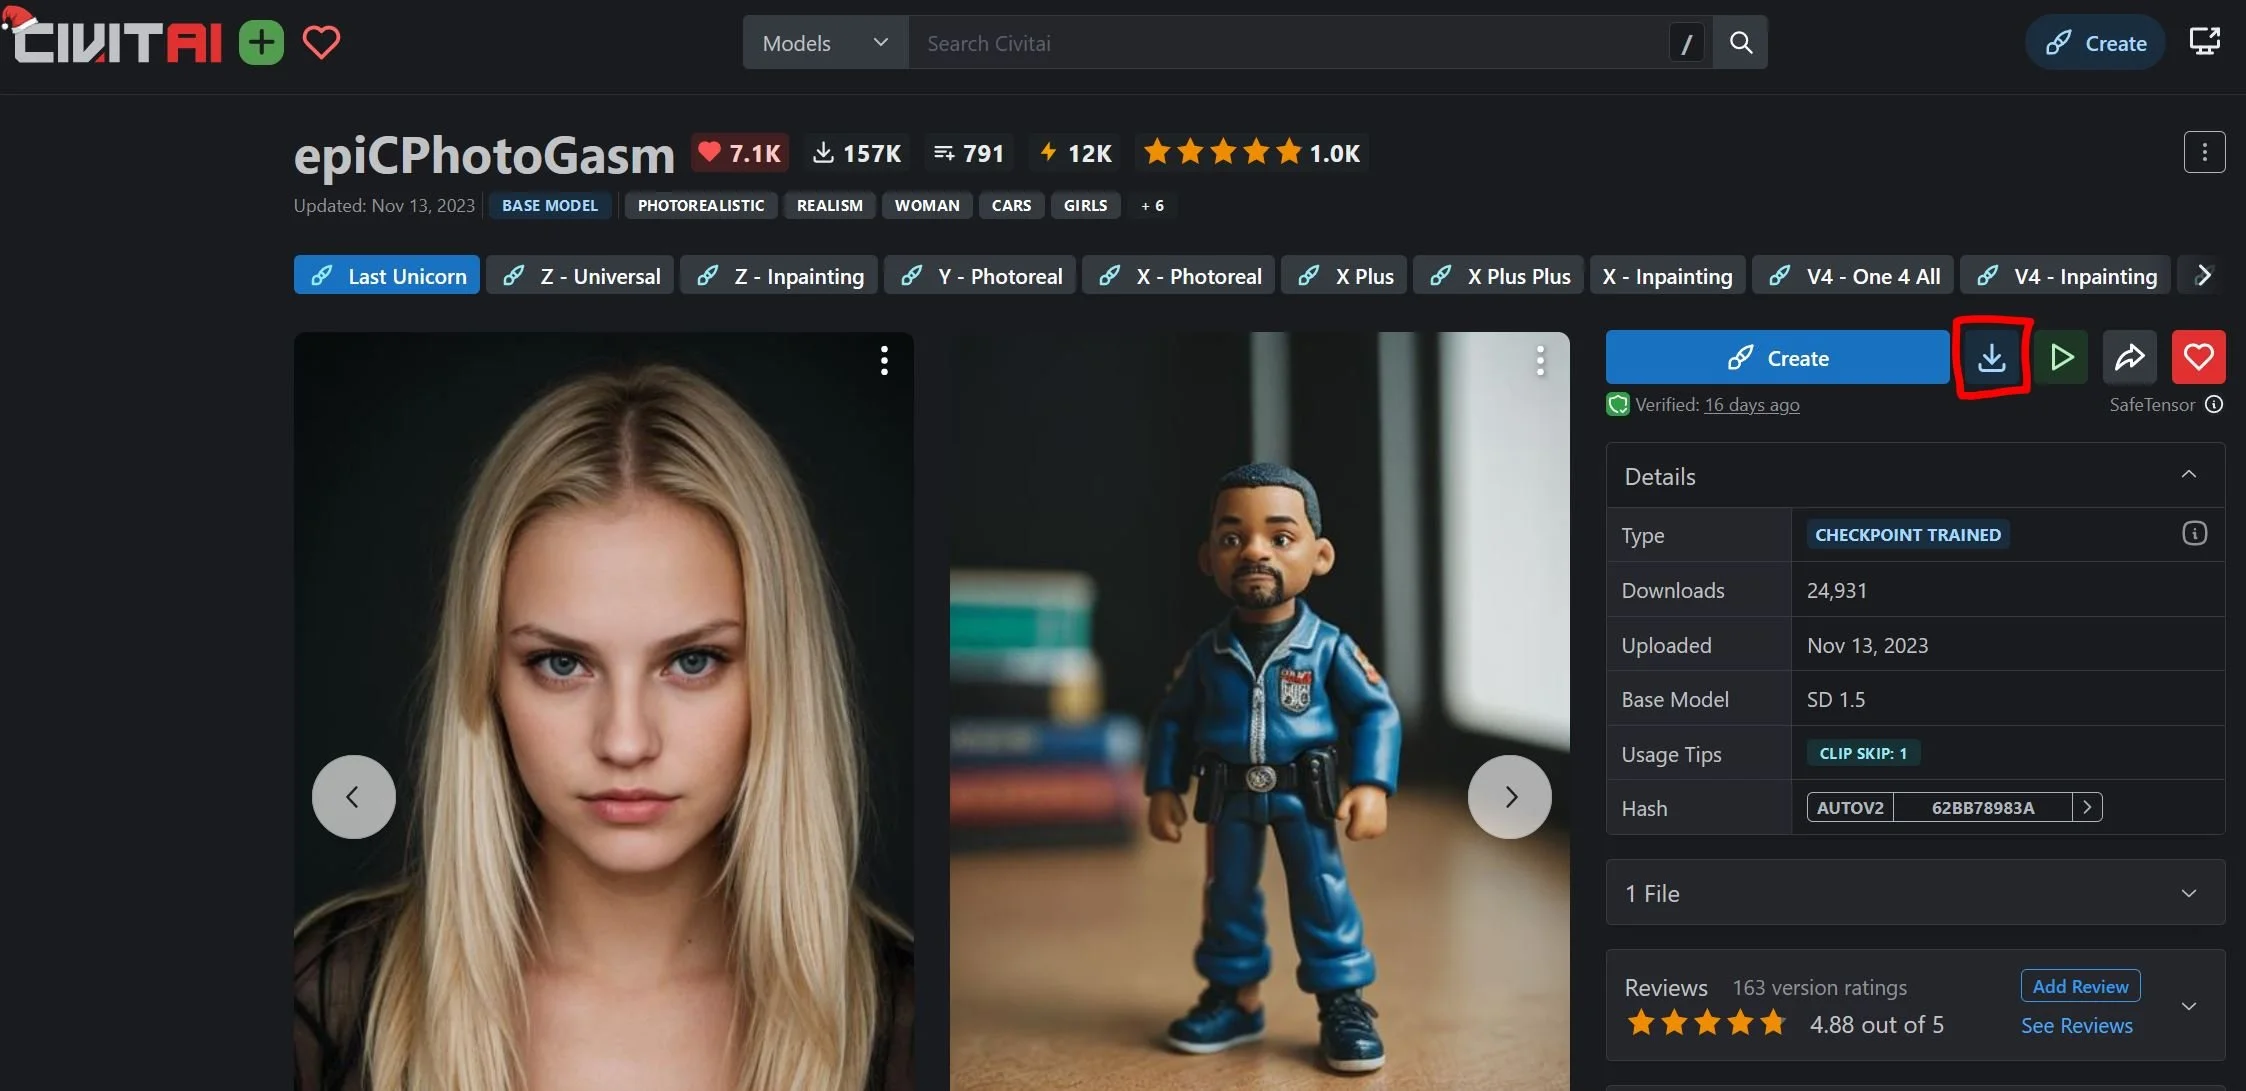
The model that comes with SD isn’t very good, so we need to download a more recently trained model for our needs. A “model” also called a “checkpoint” is a single file that contains ALL of the imagery we use when generating AI art. On first run you may have notice a 4GB file that was downloaded, that is Stable Diffusion v1.5, which is in our model directory here:
C:\stable-diffusion-webui\models\Stable-diffusionhttps://civitai.com/models/132632
Version 1.5 models contain mages that were gathered from the internet at 512 x 512 resolution. SD 2.0 used 768x768 but was never popular and never caught on for some reason. The latest is SDXL which is native 1024 x 1024 and more cinematic, meaning it has better initial composition. I still use SD 1.5 for editing my renderings, and this is my favourite set from CivitAI. The repository for all things Stable Diffusion.
Final Step: READY TO GO
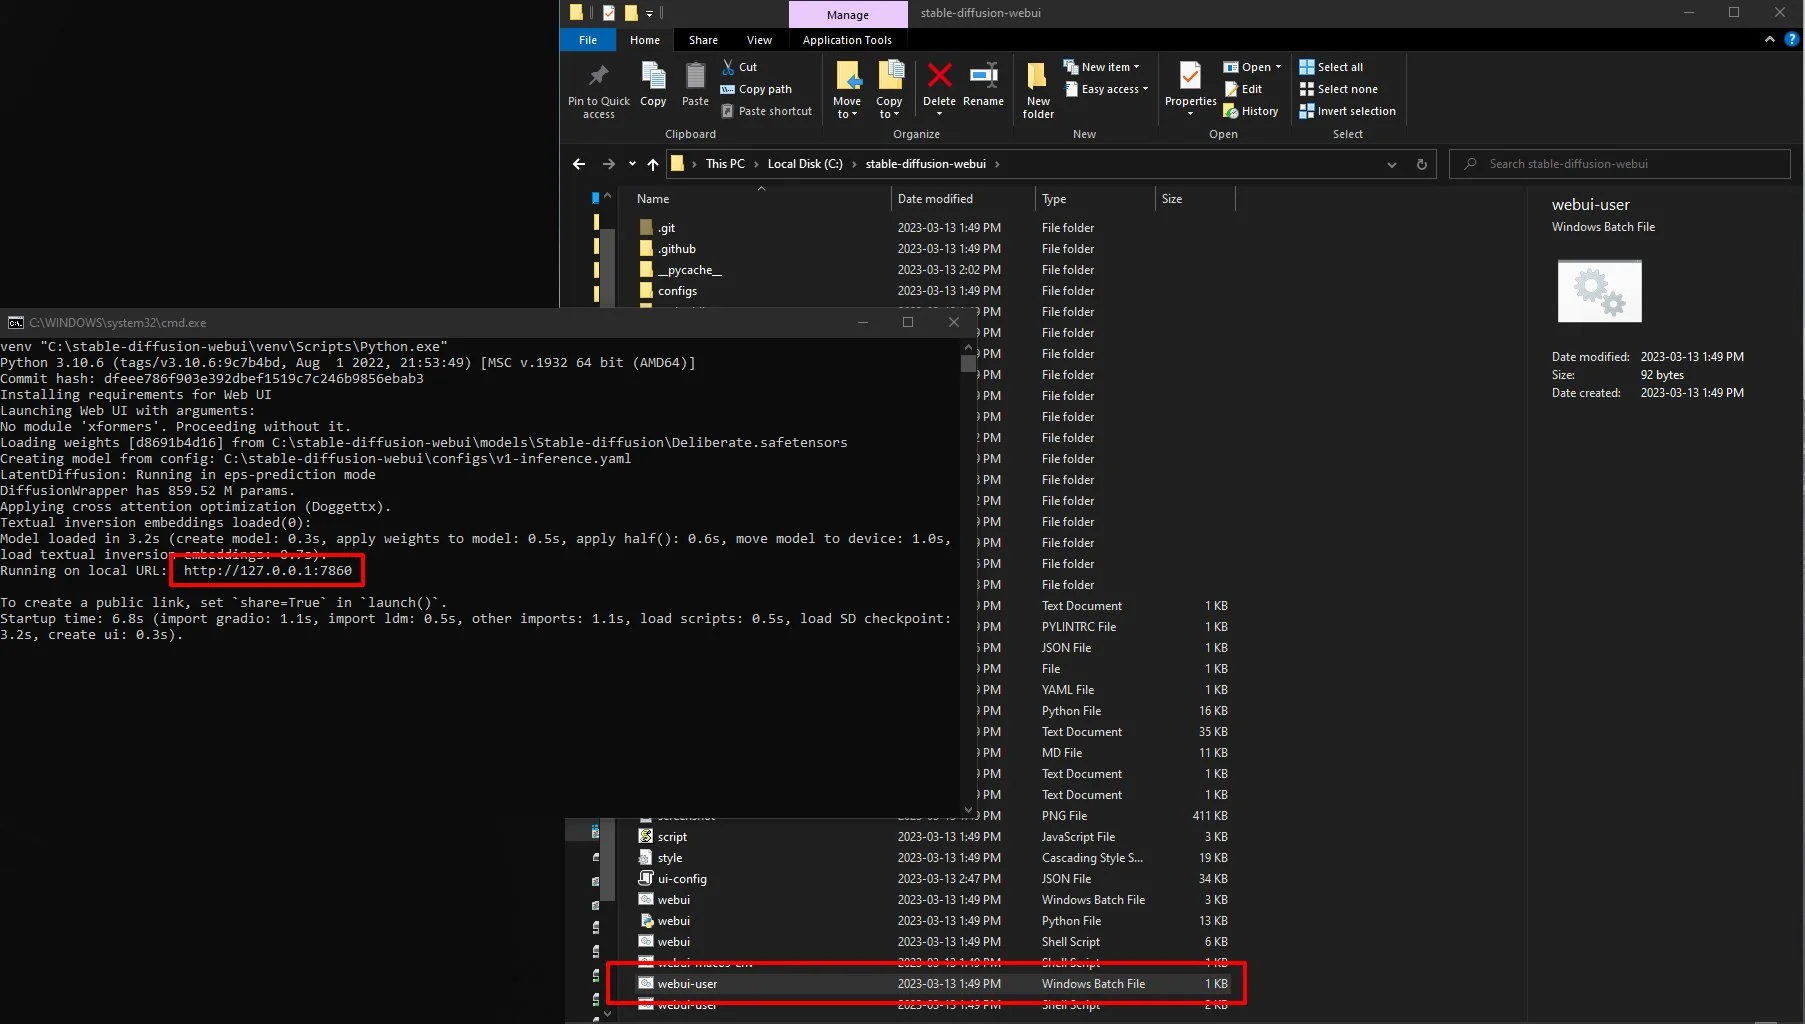
Finally you can launch Stable Diffusion. Run the webui-user.bat file, and the command window will return and display a URL. Copy that that into your browser if it does not automatically appear.
If you already have Automatic1111 running, click the refresh blue circle arrow button at the top left corner. You should now have 2 or more checkpoint models to choose from.
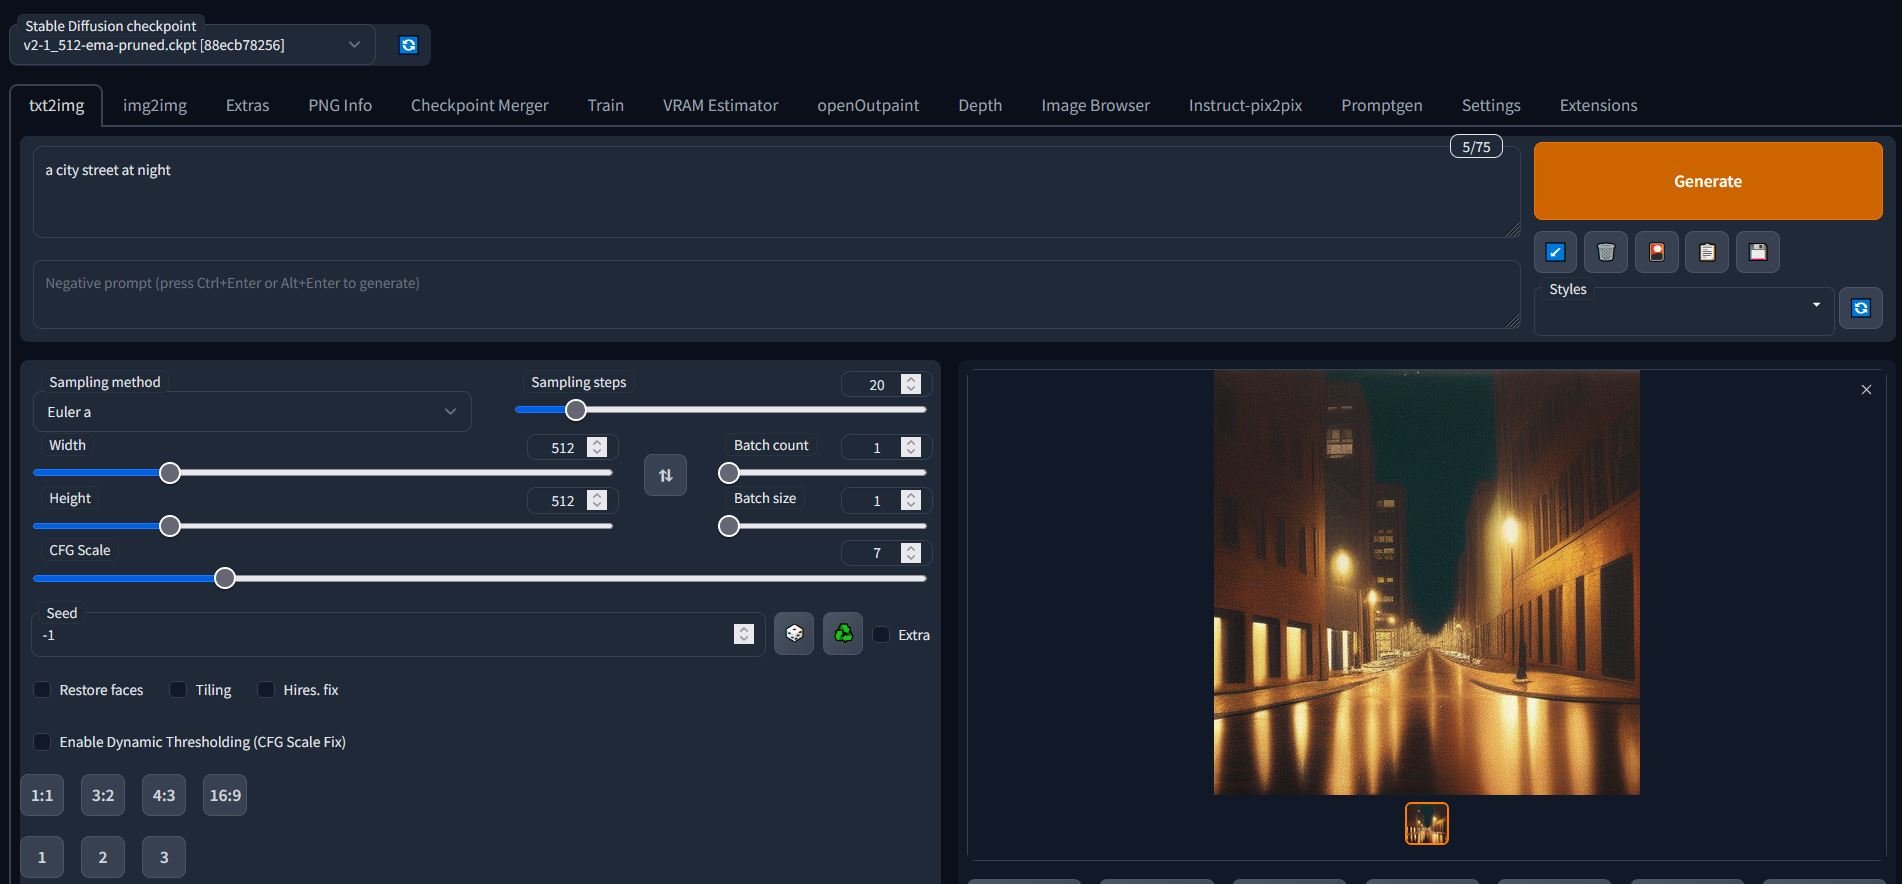
You can now generate AI images with a text prompt. You can see in the top left corner the Deliberate model is loaded by default, if not, switch to that now.
You can use any resolution you like, but for now, stick to the fixed values of 512, 768 and 1024, for example 1024 x 512. Depending on the model and your GPU using other values can lockup SD or produce weird results. If SD does freeze, close the Command window and reload.

OPTIONAL INSTALLS as of JUNE 6, 2023 - CONTROLNET & PHOTOSHOP PLUGIN
To use advanced features, you will need to install “Controlnet” from the extension tab, and then download additional models.
Click Extensions > Available
Click the big orange Load From button. You will now get a list of available extensions

Scroll down to find this Extension and Click Install

Its not installed until you “Apply” the changes in the “Installed” Tab

A new directory has been created in your Stable Diffusion WebUI directory.
Now download the models you want to use with Controlnet. The most popular are but not limited to;
Canny, Depth, OpenPose, But you should download them all if you have the bandwidth from


PHOTOSHOP PLUGIN
This is a free opensource plugin available on Github
https://github.com/AbdullahAlfaraj/Auto-Photoshop-StableDiffusion-Plugin
You can scroll down to see the install instructions, or skip and click the latest version link I’ve highlighted below

Now download the CCX File. Don’t worry, its a Photoshop extension and will not harm your computer.
Double Click to install the Plugin and you will get a notification box. You’re confirmation box may look different you don’t have Creative Cloud installed


Once the plugin is installed, it should popup on Photoshop load, if not you can find it here

The video on Youtube goes into further detail and explanation of the image generation process. You can also support me on Patreon, I post new tutorials how you can add AI to your Architecture workflow each month, or consider purchasing one of my tutorial packages in the Shop page!
This site has a great explaination of all the settings. https://stable-diffusion-art.com/automatic1111/